


ルーター(WSR-5400AX6)からチョット離れた部屋でBDレコーダをネットに接続するためにWiFi設定をしたところ、受信レベルが1桁となった。新たなLANケーブルの配線は壁を通すなど面倒である。そこで、WiFiを中継して信号レベルを上げることができる無線LAN中継器を使ってみた。
購入した無線LAN中継器はバファローのWEX-733DHPSである。5GHzで433Mbps、2.4GHzで300Mbpsと1Gbpsを超える最新のものに比べるとそんなに早くないが、有線LAN端子も備えており、テスト用として、値段が安価(\1,980)なのでこれに決めた。
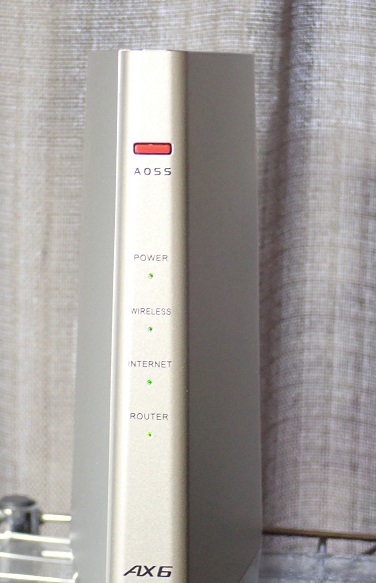
ルーター親機にAOSS機能があると簡単に接続出来るので、以下の手順で初期設定した。
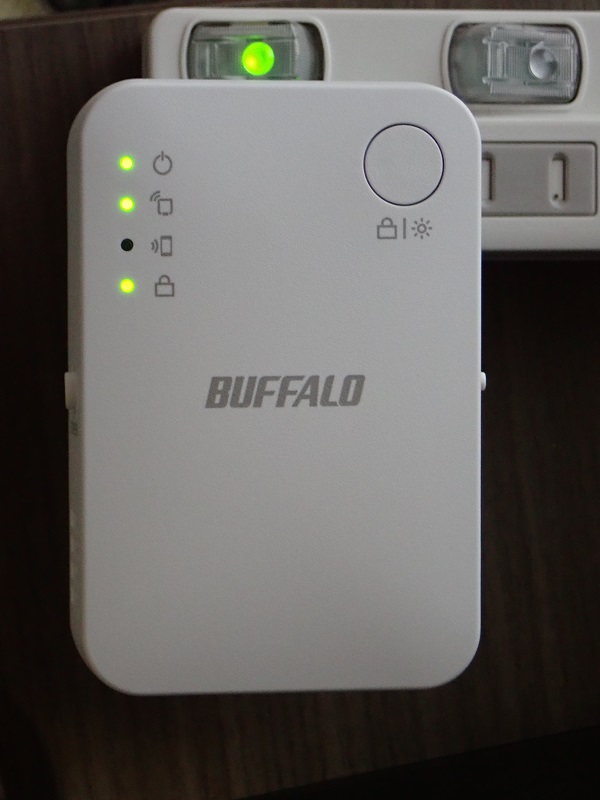
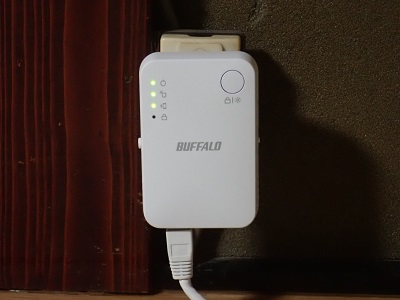
中継器の設定が終了したら、実際に使いたいところのコンセントに中継器を差し込む。しばらく待っていると、「親機接続ランプ」が「緑点灯」し、接続完了。親機接続ランプが点滅している場合は、通信状態が悪いので、もっと親機に近いところのコンセントを利用すること。
中継器は親機の情報を引き継ぐので、中継器経由の場合でも設定を変更することなく、どちらかに自動で接続される。なお、複数の中継器を使う場合は、並列ではなく直列にする必要がある。中継器のSSIDはExtender-X-XXXXで、このSSIDで接続すると、中継器への接続が固定される。
中継器の設定が終了後、受信レベルが30前後と十分な値となった。また、この中継器には有線LAN出力もあるのでWifi入力の無いレコーダやパソコンにLANケーブルで接続出来る。
 |
 |
 |
| 中継器設定中 | 親機(AOSS有) | 中継器として稼働中 |
前報(abc830)で、DrawImageメソッドを使って、ピクチャーボックスに写真などの画像を表示する方法を紹介したが、画像(image)と描画(graphics)は以下のように違いがある。
ImageにはDrawLineメソッドなどが無いので、Graphics.FromImageメソッドでImageからGraphicsオブジェクトを取得し、そのGraphicsオブジェクトに描画を行うとImageに描画される。
Dim img As System.Drawing.Image = System.Drawing.Image.FromFile("C:\test.jpg")
Image は画像データに対する総称型であり、実際のインスタンスはSystem.Drawing.Image クラスを継承した画像クラスであるBitmap(.jpg/.bmp/.png/.gif/.tif)とImaging.Metafile(.wmf/.emfなど)からなる。
Public Class Form1
  Private Sub Button1_Click(sender As Object, e As EventArgs) Handles Button1.Click
	Dim ofd As New OpenFileDialog() With {
		.Title = "画像を選択",
		.Filter = “イメージファイル|*.bmp;*.jpg;*.gif;*.png"
		}
	If ofd.ShowDialog() <> DialogResult.OK Then
		Return
	End If
	Dim img = Image.FromFile(ofd.FileName)
	If img Is Nothing Then
		MessageBox.Show("ファイルが開けません")
		Return
	Else
		PictureBox1.Image = img
	End If
  End Sub
End Class |
 |
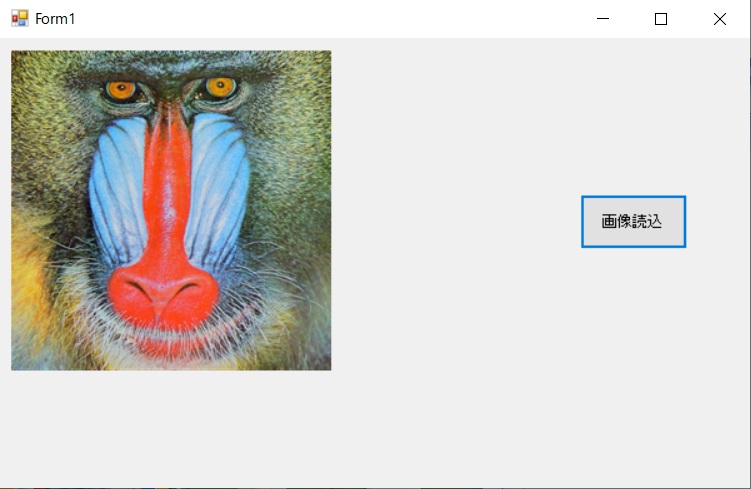 |
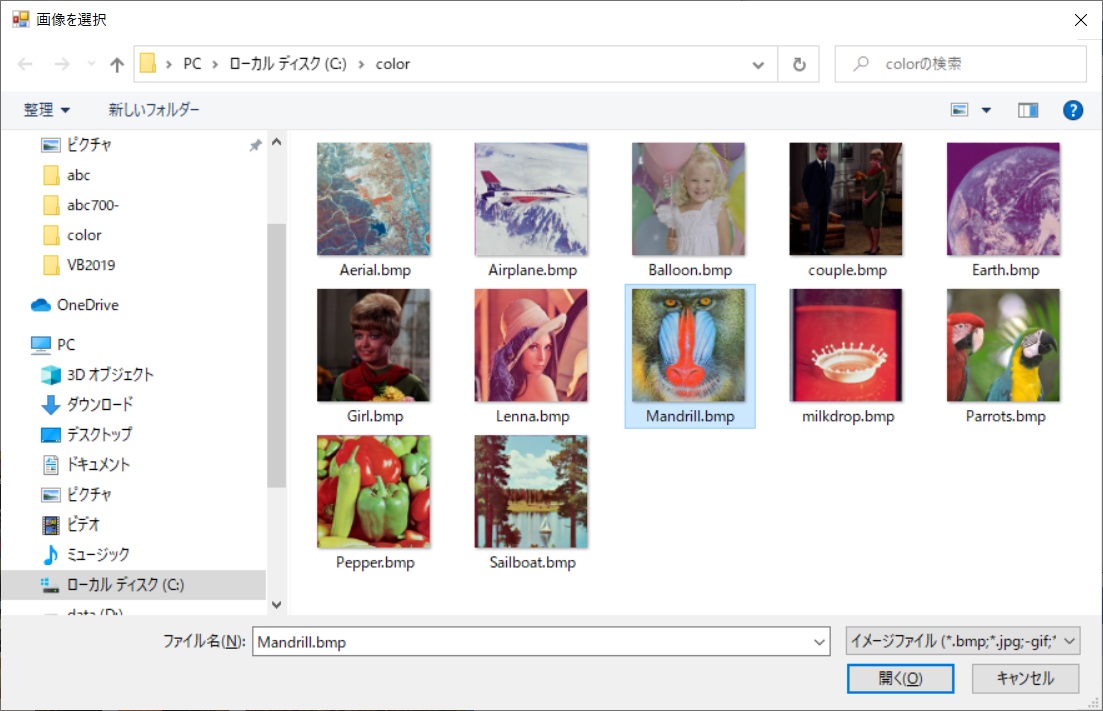
| FileOpenダイアログで画像ファイルを選択 | ピクチャーボックスに画像を表示 |
  Private Sub Button2_Click(sender As Object, e As EventArgs) Handles Button2.Click
	Dim sfd As New SaveFileDialog() with {
		.Title  = "画像を保存",
		.Filter =“イメージファイル(*.jpg)|*.jpg"
		}
	If sfd.ShowDialog() <> DialogResult.OK Then
		Return
	End If
	TextBox1.Text = system.IO.Path.GetFileName(sfd.FileName)
	PictureBox1.Image.Save(sfd.FileName,System.Drawing.Imaging.ImageFormat.Jpeg)
	MessageBox.Show("画像を保存しました")
  End Sub
|
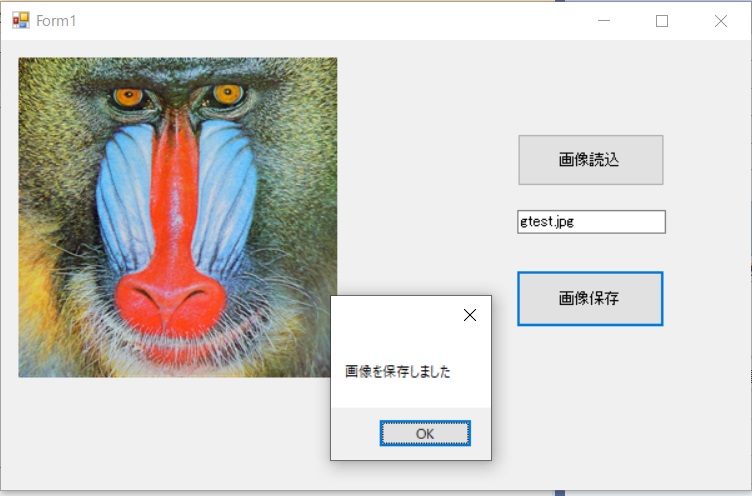 |
| 画像を保存 |
  Private Sub Button3_Click(sender As Object, e As EventArgs) Handles Button3.Click
	Dim gph As Graphics = Graphics.FromImage(PictureBox1.Image)
	Dim fnt As New Font("MS UI Gothic", 20)
	Dim brh As New SolidBrush(Color.Red)
	gph.DrawString("文字描画テスト", fnt, brh, 20, 20)
	PictureBox1.Refresh()   	'画像の再表示
	fnt.Dispose()           	'リソーズの解放
	brh.Dispose()
	gph.Dispose()
  End Sub
|
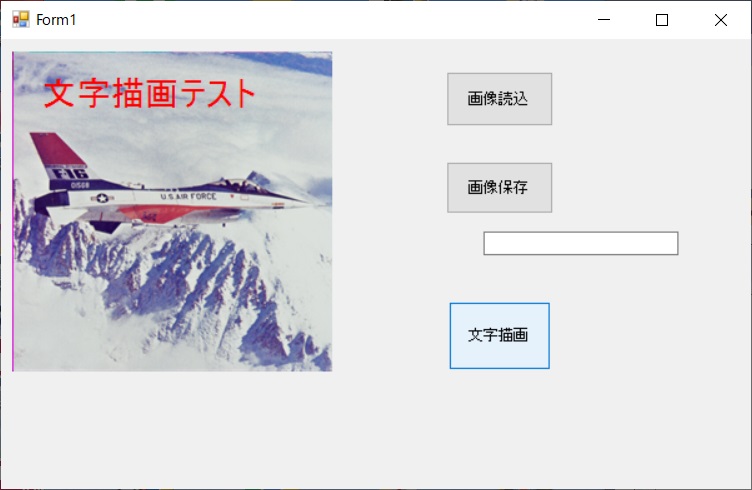 |
| 画像に文字を入れた例 |
  Private Sub Button4_Click(sender As Object, e As EventArgs) Handles Button4.Click
	Dim img As New Bitmap(PictureBox1.Image)
	Dim gph As Graphics = PictureBox2.CreateGraphics()
	'ColorMatrixオブジェクトの作成
	Dim cmx As New System.Drawing.Imaging.ColorMatrix(New Single()() _
		{New Single() {-1, 0, 0, 0, 0},
		 New Single() {0, -1, 0, 0, 0},
		 New Single() {0, 0, -1, 0, 0},
		 New Single() {0, 0, 0, 1, 0},
		 New Single() {1, 1, 1, 0, 1}})
	Dim iat As New System.Drawing.Imaging.ImageAttributes()
	iat.SetColorMatrix(cmx)
	Dim rct = New Rectangle(0, 0, img.Width, img.Height)
	gph.DrawImage(img, rct, 0, 0, img.Width, img.Height, GraphicsUnit.Pixel, iat)
	gph.Dispose()
	img.Dispose()
  End Sub
|
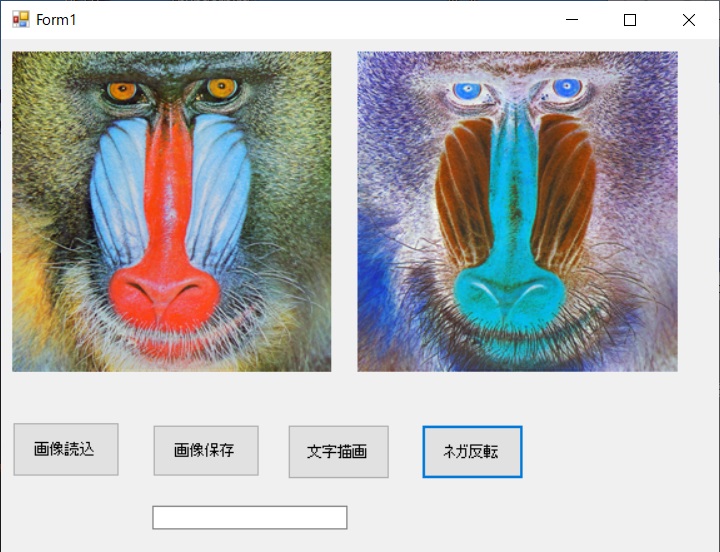
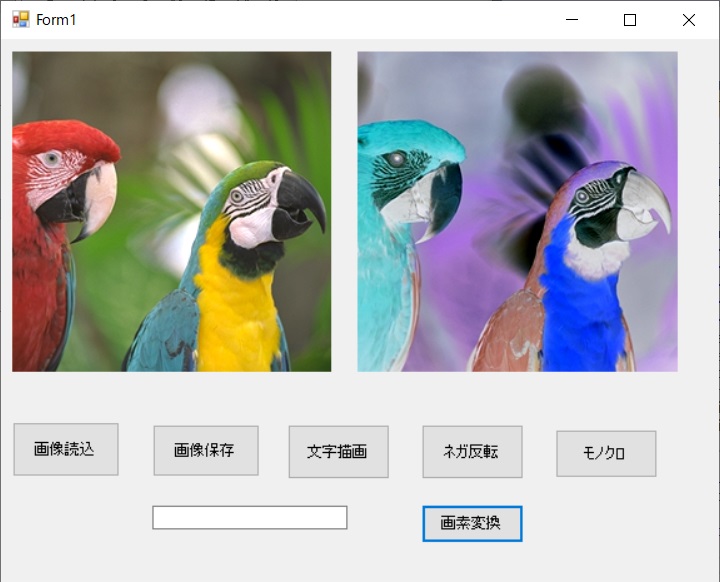
  Private Sub Button5_Click(sender As Object, e As EventArgs) Handles Button5.Click
	・・・
	Dim cmx As New System.Drawing.Imaging.ColorMatrix(New Single()() _
		{New Single() {0.299F, 0.299F, 0.299F, 0, 0},
		 New Single() {0.587F, 0.587F, 0.587F, 0, 0},
		 New Single() {0.114F, 0.144F, 0.144F, 0, 0},
		 New Single() {0, 0, 0, 1, 0},
		 New Single() {0, 0, 0, 0, 1}})
	・・・
|
 |
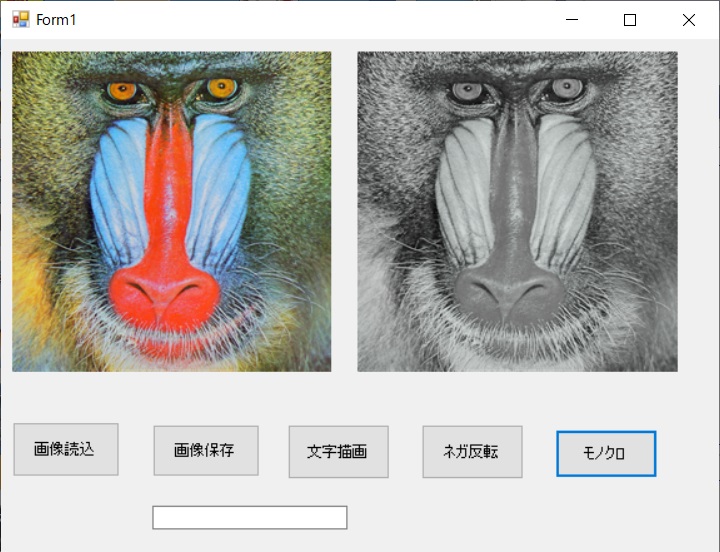 |
| 色反転(ネガ)の例 | モノクロ(グレースケール)化の例 |
Private Sub Button6_Click(sender As Object, e As EventArgs) Handles Button6.Click Dim bmp As New Bitmap(PictureBox1.Image) For x As Integer = 0 To bmp.Width - 1 For y As Integer = 0 To bmp.Height - 1 Dim col As Color = bmp.GetPixel(x, y) Dim red As Integer = 255 - col.R Dim grn As Integer = 255 - col.G Dim blu As Integer = 255 - col.B bmp.SetPixel(x, y, Color.FromArgb(col.A, red, grn, blu)) Next Next PictureBox2.Image = bmp End Sub |
 |
| ビット単位で画像を反転 |
Private Sub Button7_Click(sender As Object, e As EventArgs) Handles Button7.Click Dim bmp As New Bitmap(PictureBox1.Image) Dim gph = PictureBox2.CreateGraphics() Dim img = My.Resources.apple2 Dim iat As New System.Drawing.Imaging.ImageAttributes() iat.SetColorKey( Color.FromArgb(220, 220, 220), Color.FromArgb(255, 255, 255)) Dim rct1 = New Rectangle(0, 0, bmp.Width, bmp.Height) Dim rct2 = New Rectangle(100, 10, img.Width, img.Height) gph.DrawImage(btm, rct1, 0, 0, bmp.Width, bmp.Height, GraphicsUnit.Pixel) gph.DrawImage(img, rct2, 0, 0, img.Width, img.Height, GraphicsUnit.Pixel, iat) bmp.Dispose() gph.Dispose() img.Dispose() End Sub |
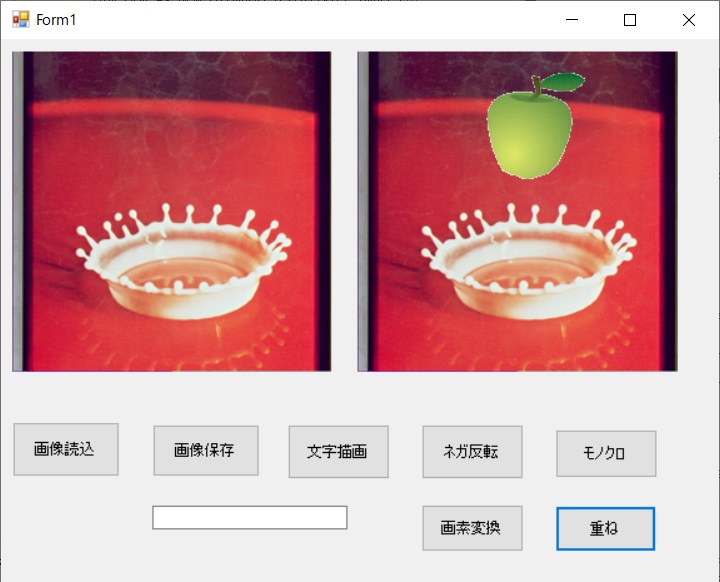 |
| 画像を重ねた例 |
 |
| リソースの追加画面 |
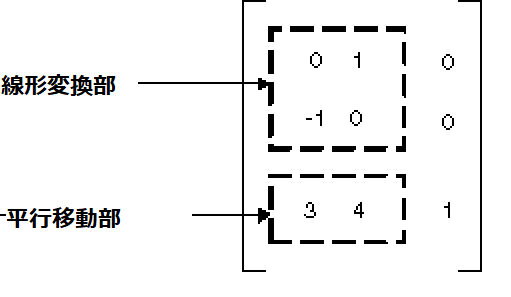 |
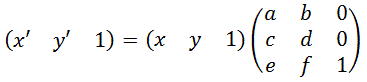
| Matrixオブジェクトのアフィン行列 |
| 平行移動: | TranslateTransform(Single dx, Single dy) |
| サイズ変更: | ScaleTransform(Single sclX, Single sclY) |
| 回 転: | RotateTransform(Single agl) |
| 設定初期化: | ResetTransform () |
Private Sub Button8_Click(sender As Object, e As EventArgs) Handles Button8.Click Dim bmp As New Bitmap(PictureBox1.Width, PictureBox1.Height) Dim gph As Graphics = Graphics.FromImage(bmp) Dim img As Image = My.Resources.apple gph.DrawImage(img, New Rectangle(0, 0, img.Width, img.Height)) gph.ResetTransform() gph.TranslateTransform(0, img.Height + 10) gph.DrawImage(img, New Rectangle(0, 0, img.Width, img.Height)) gph.ResetTransform() gph.ScaleTransform(2.0F, 2.0F) gph.DrawImage(img, New Rectangle(50, 0, img.Width, img.Height)) gph.ResetTransform() gph.RotateTransform(45.0F) gph.DrawImage(img, New Rectangle(200, 60, img.Width, img.Height)) PictureBox1.Image = bmp img.Dispose() gph.Dispose() End Sub |
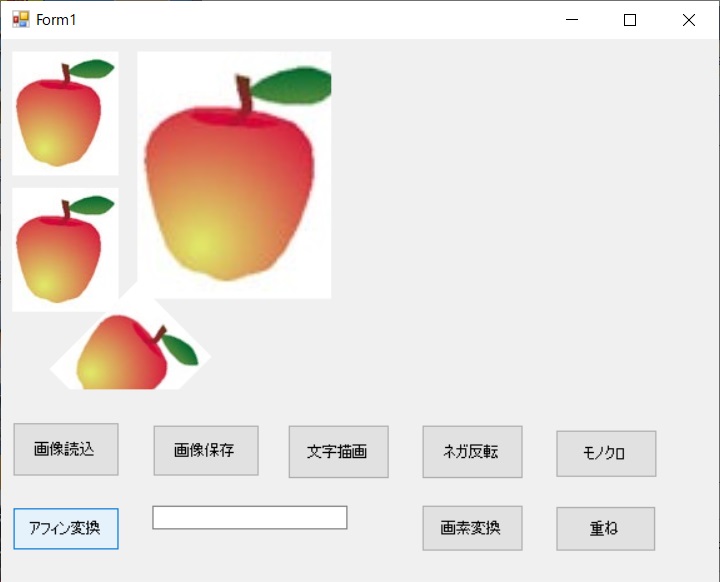 |
| アフィン変換例 |
★ 画像を扱う方法は、他にも多数の方法があり、ココではその1例のみを紹介。
また、エラー処理を行っていないので、追加して下さい。(あくまでも自己責任で)
 |
 |
 |